
English| EUR
Suggested for you
More currencies
Choose a language
The route to Pallay Punchu's summit follows a single continuous path with minimal branching, but terrain shifts and elevation markers become critical orientation tools once cloud cover moves in. This guide maps the ascent's key waypoints, terrain transitions, and visual landmarks that define each segment of the climb.
Quick answer
The pallay punchu trail map covers a 3.2-kilometer ascent from the Layo trailhead at 4,100 meters to the summit ridge at 4,900 meters, with six marked waypoints and three distinct terrain zones. The route follows a single-track path with stone cairns placed every 200 meters after the grassland plateau, and painted markers on rock faces in the final scree approach. Most navigation challenges occur in the upper ridge where lateral paths to viewpoints diverge from the main summit track.
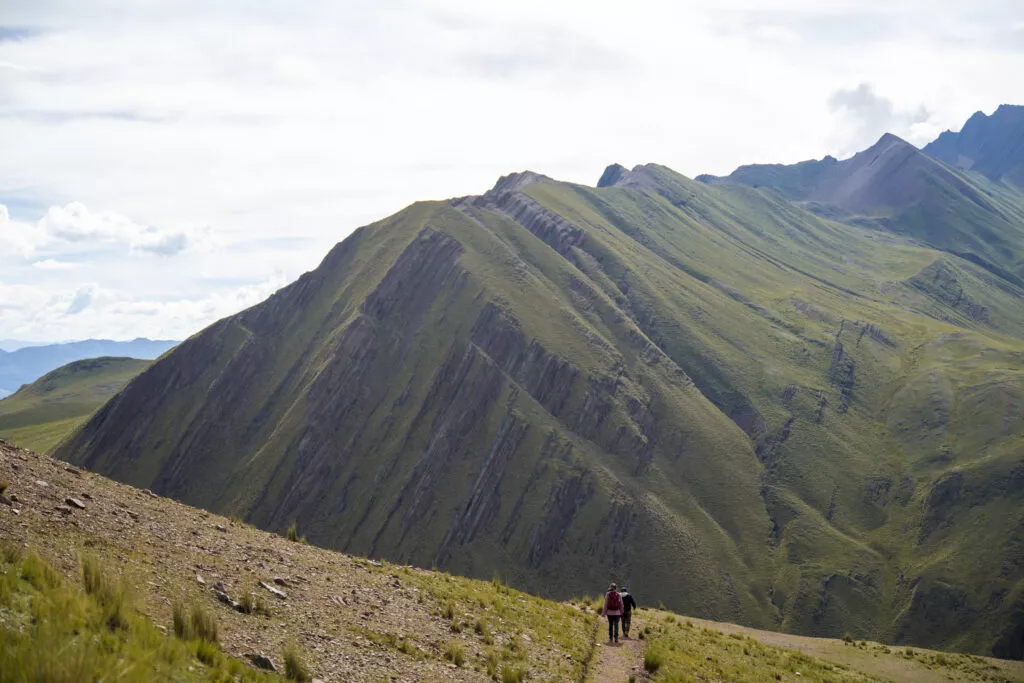
The trailhead marker stands 400 meters uphill from the Layo District entry gate, where a weathered wooden post marks the transition from vehicle track to footpath. From that point the route climbs northeast through open puna grassland for the first 1.1 kilometers, a gradual ascent with wide sight lines and no ambiguity in direction. Stone cairns begin appearing once the path narrows past the stream crossing at 4,400 meters, where the grassland gives way to exposed mineral slopes and the first bands of red and ochre sediment become visible underfoot. A pallay punchu trail map divides the ascent into three legible segments: the grassland approach, the mineral traverse, and the summit scree. The mineral traverse occupies the middle 1.4 kilometers and presents the route's steepest sustained gradient, with switchbacks carved into slopes that shift color from rust to yellow to olive as elevation increases. Painted white markers on flat rock faces appear every 150 meters in this zone, placed deliberately on the uphill side of each switchback to guide hikers through sections where the path blends into surrounding scree. The final 700-meter segment climbs directly up loose talus to the ridgeline, where a cluster of stone cairns marks the official summit viewpoint at 4,900 meters. Lateral paths branch off the main route in two locations: a spur trail to a lower overlook at 4,650 meters, and a secondary ridge path that parallels the summit approach but terminates at a false peak 200 meters south. Both are visible from the main trail, but neither is marked with cairns. The summit ridge itself stretches 300 meters along an east-west axis, with the highest elevation and widest views concentrated at the eastern terminus where a large cairn and metal survey marker sit anchored into bedrock. Wind patterns intensify after midday, and low cloud cover frequently obscures the lower switchbacks by early afternoon, making descent navigation more difficult than the ascent. Route finding depends less on a printed pallay punchu trail map than on reading the cairn sequence and recognizing the terrain transitions that bracket each zone. The path is unambiguous in clear conditions, but becomes harder to trace in fog or during the wet months when runoff erases sections of the track and forces detours around saturated ground. Cairns remain the most reliable navigation aid throughout the year, supplemented by the painted markers in the mineral traverse where the path crosses bare rock too unstable to hold stacked stones.
“Cairns remain the most reliable navigation aid throughout the year, supplemented by painted markers where the path crosses bare rock too unstable to hold stacked stones.”
The Pallay Punchu trail follows a marked route from the community checkpoint to the rainbow ridgeline, covering approximately 3.5 kilometers with 400 meters of elevation gain. Most hikers complete the ascent in 90 to 120 minutes.
Pass through the entrance gate where the fee is collected and follow the marked trailhead northwest toward the base of the slope. The path begins as a wide dirt track—stay on it rather than cutting across the grass.
The first third of the trail climbs through eleven switchbacks that ease the gradient. Many hikers rush this section and tire before the steeper middle segment; maintain a sustainable pace.
At roughly 4,600 meters you'll reach a flat saddle with a stone cairn—this is the halfway marker. The trail forks here; take the left (western) branch that continues uphill toward the visible ridgeline.
The final 1.2 kilometers are steeper and fully exposed, with loose scree in patches. Step carefully on unstable rocks and use trekking poles if you brought them; the trail is less defined here but cairns mark the route every 50 meters.
The trail ends at the main ridgeline at approximately 4,900 meters, where the mineral striations are most vivid. Walk along the crest for different vantage points, staying on the established path to avoid damaging the fragile surface.
There is no loop trail—return the way you came, using the switchbacks to control your speed on the descent. Afternoon wind picks up after 14:00, so plan your turnaround time accordingly.
Pallay Punchu is located in the Layo District, Canas Province, within the Cusco Region of Peru. The most common approach involves traveling south from Cusco city toward the province of Canas.
Route 3S (Cusco to Sicuani) then local roads to Layo
Bus from Cusco to Sicuani, then local transport to Layo
Private hire from Cusco to Layo District trailhead
Private or rented transport is recommended for this route, as public transport options to Layo are limited and require multiple transfers. Ensure your vehicle is suitable for high-altitude Andean roads.
The best arrival window is 07:00–11:00, as this period offers clearer visibility and superior light for photography before afternoon clouds and wind accumulate. Coordinating your trail map navigation during these morning hours is essential for safe transit across the high-altitude terrain.
Clear skies, 2°C to 15°C
Stable weather provides the highest probability of unobstructed mountain views. Early arrival remains necessary to avoid afternoon precipitation.
Variable, 5°C to 18°C
Frequent rainfall and fog may obscure path markers. Trail navigation requires heightened caution during this period.
—
Visiting mid-week offers quieter trails and optimal light conditions. Arriving at the start of the daily window ensures maximum visibility.
Verdict: The best time to utilize your Pallay Punchu trail map is between 07:00 and 11:00 during the dry season months of May through September.
The Pallay Punchu trail is open to visitors six days per week, with a designated closure day every Sunday.
Prepare for high-altitude trekking with these essential items to ensure safety and comfort on the trail.
Everything you need to know about pallay punchu trail map
While a digital or physical pallay punchu trail map is helpful for orientation, the path is generally marked by the local community. We recommend using a reliable map to stay on the main route across the high-altitude terrain. Following the established trail helps preserve the surrounding environment and ensures a safer journey through the Canas Province landscape. Proper preparation is essential as weather conditions can change quickly during your excursion.
The trailhead for this site is situated in the Layo District, Canas Province, within the Cusco Region of Peru. Travelers often utilize local transport to reach this remote Andean destination. Referencing a precise pallay punchu trail map can assist in identifying the correct access point from the Layo road network. Ensure your transport arrangements allow enough time for travel from Cusco before your planned hike.
Yes, there is a community entrance fee of 20 PEN per person required for access to the area. This fee is collected by local representatives to support the maintenance and preservation of the site. Please have the exact currency ready when you arrive at the checkpoint. Always verify that you are paying at the official entry point to ensure your contribution supports the local community.
The site is open from Monday through Saturday, 07:00–18:00. It is closed on Sundays, so please plan your visit for the available days. Following these designated hours ensures you have adequate time for your walk before the gates close. Using a detailed pallay punchu trail map helps you manage your pace to return within these operational windows.
The best arrival window is between 07:00–11:00 to ensure clearer visibility and optimal light for photography. Arriving early helps you avoid the afternoon clouds and wind that frequently develop in this mountain region. This timing is ideal for capturing the unique geological colors of the landscape before environmental conditions shift. Early visitors typically experience the most stable weather for their trek.
Children are permitted on the trail, provided they are accustomed to high-altitude exertion and walking on uneven terrain. Parents should exercise caution and monitor for signs of altitude fatigue throughout the hike. Consulting a reliable pallay punchu trail map allows families to plan shorter stops and maintain a comfortable, safe pace for younger trekkers.
High-altitude trekking requires careful attention to hydration and weather monitoring, as the elevation can impact physical stamina. Ensure you carry sufficient supplies and wear appropriate gear for changing mountain temperatures. Following the marked paths and respecting local regulations will keep you on the correct route. Staying aware of your surroundings is the most effective way to navigate this landscape safely.